# Configure and Install
To install the webchat module, please follow the simple steps below:
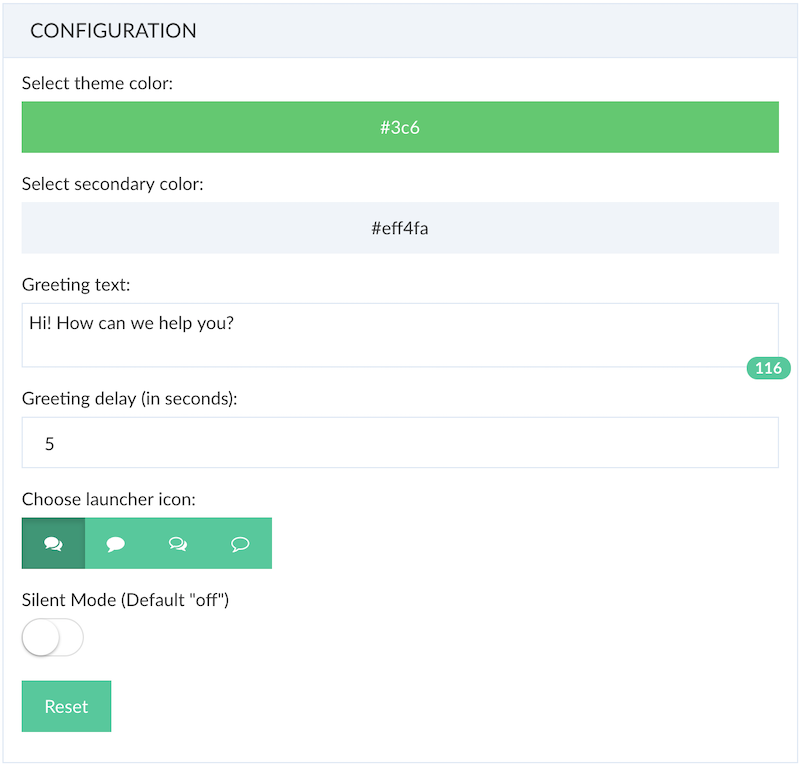
Click on the configure icon in your dashboard:
To ensure that it is consistent with your brand, customize the look and feel of the module:
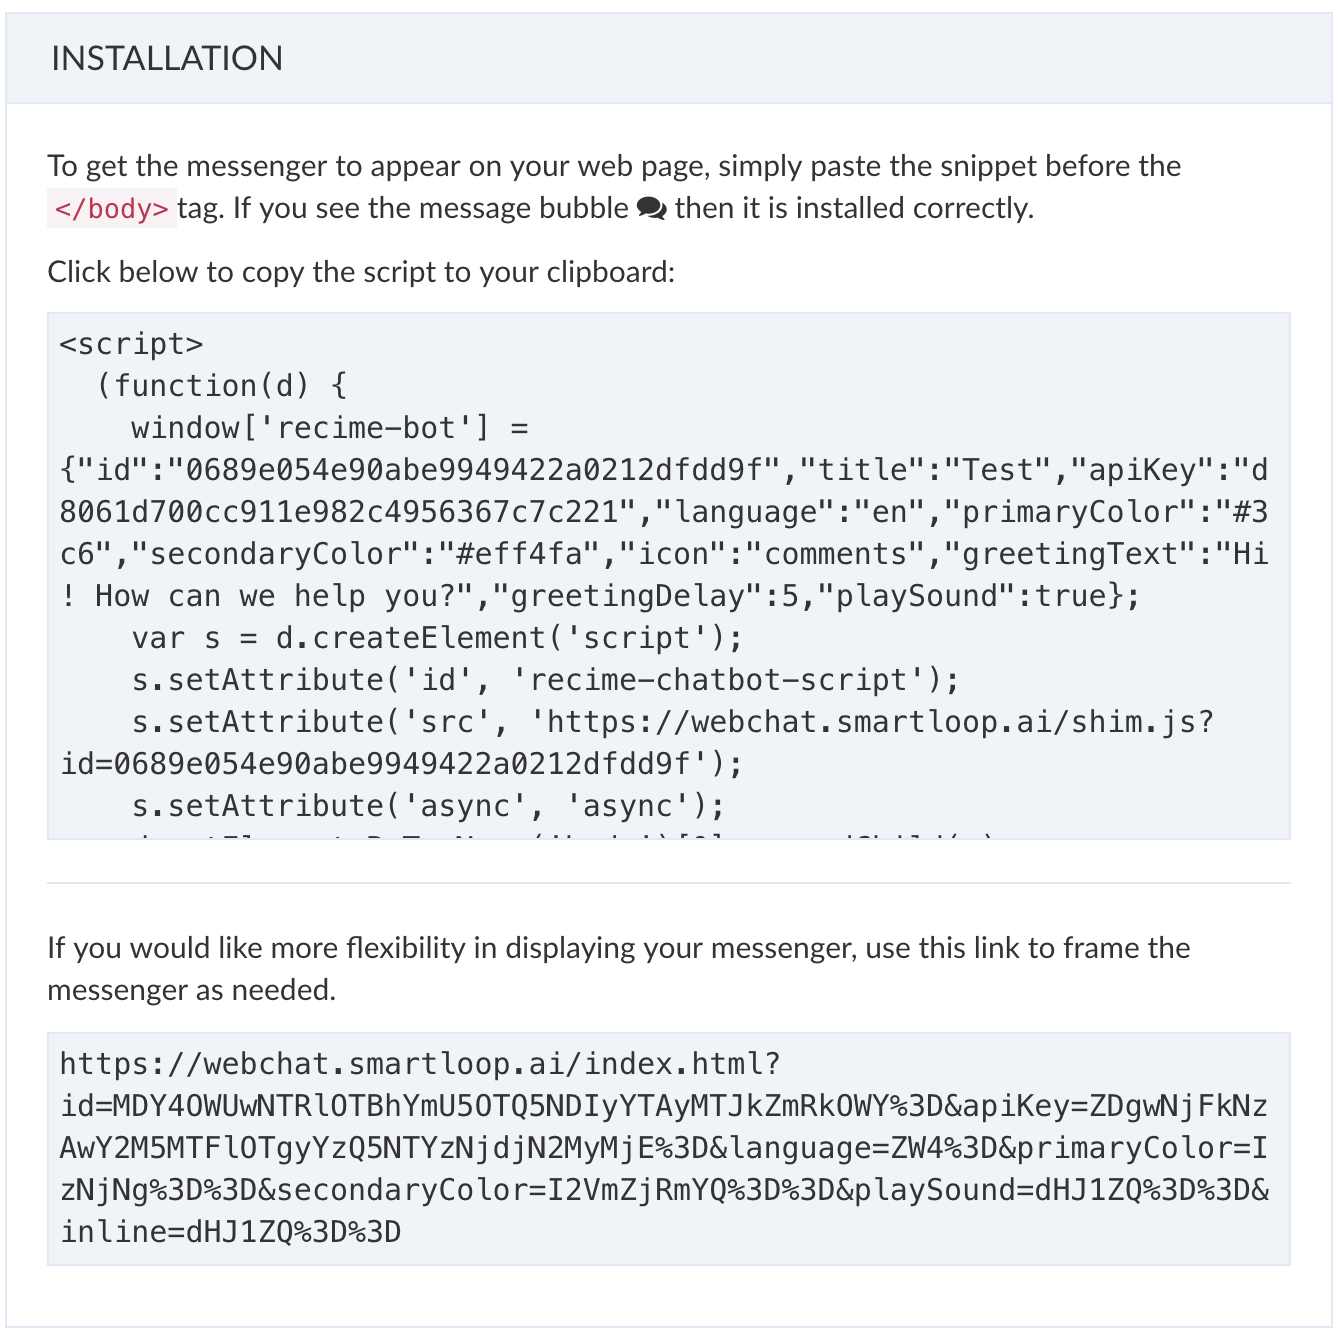
Next, follow the instructions to copy and paste the webchat module to your site:
# Sending User Attributes
User attributes allows you to track details about your subscribers. You use this data to segment them and send targeted messges to them.
Below is an example, showing how to track basic user profile, as well as custom attributes that could be valuable to qualify a lead or provide better support:
<script>
    window.addEventListener('load', function () {
        const userId = webchat.getUserId();

        webchat.setUser({
            first_name: 'John',
            last_name: 'Doe',
            country : 'US',
            email: 'john@smartloop.ai',
            custom: {
                external_ip: "172.16.0.1"
            }
        });
    });
</script>
In additon to segmenting users, you can capture custom user attributes in the following way from a script block:
import Ext from 'bot-extension';
const __ = Ext.default;

exports.handler = (context, done) => {
    const externalIP = context.vars.get("external_ip");

    console.log(externalIP);

    done();
};
Use the request module to save it to CRM or create addtional attributes based on it for a more personalized conversational experience.
# Sending Events to the Bot
Send an event notification to the bot to trigger a flow.
The following example provides an example of how to set it up after the bot is set up.
First, create the HTML button object:
<button id="request-a-demo">Request a Demo</button>
Copy and paste the following script before the <body/> tag:
<script>
 (function(d) {
 d.addEventListener('DOMContentLoaded', function() {
 d.getElementById('request-a-demo').addEventListener('click', function() {
 webchat.open('block-id');
 });
 });
 })(document);
</script>
Here, it will open the website bot and take the user to the flow for the given block when the user clicks on Request a Demo button.
To configure the script with a block id, Inside the builder, click on the </> icon to get started:

# Properties
Below is a table with the definition of properties to configure your widget:
| Configuration | Value |
|---|---|
| Theme Color | Theme of the bot. It includes icon, text and bar color |
| Secondary Color | Color of the text bubble. |
| Greetings text | Shown the first time the page loads. |
| Greetings delay | Delay in seconds before showing the greetings message. Default = 5 seconds |
| Launcher Icon | Start button icon |
| Silent Mode | On/Off. Default = off |
# Additional Properties
You can further customize the widget by configuring the following properties:
| Name | Value | Default |
|---|---|---|
| position | Position the widget to left or right of the screen | right |
| height | Height of the widet (e.g.80%) | Widget default |
| attachment | Toggle attachment support true or false | true |
Example:
<script>
  (function(d) {
    window['recime-bot'] = {"id":"##","title":"Smartloop","apiKey":"##","language":"en","primaryColor":"#008eff","secondaryColor":"#eff4fa","avatar":"https://icons.recime.io/13d7bc056350b4f3d56dca1c753ce1e7.png","greetingText":"👋 How can we help you?","greetingDelay":2,"playSound":true, "position": "left", "height": "80%", "attachment": false};
    var s = d.createElement('script');
    s.setAttribute('id', 'recime-chatbot-script');
    s.setAttribute('src', 'https://webchat.smartloop.ai/shim.js');
    s.setAttribute('async', 'async');
    d.getElementsByTagName('body')[0].appendChild(s);
  })(document);
</script>